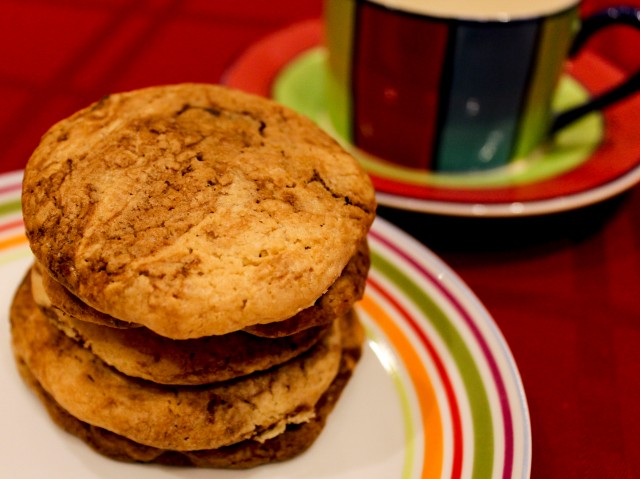
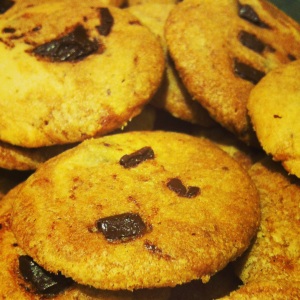
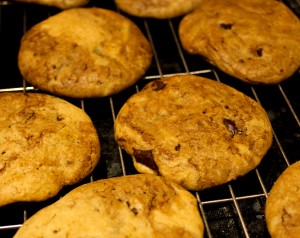
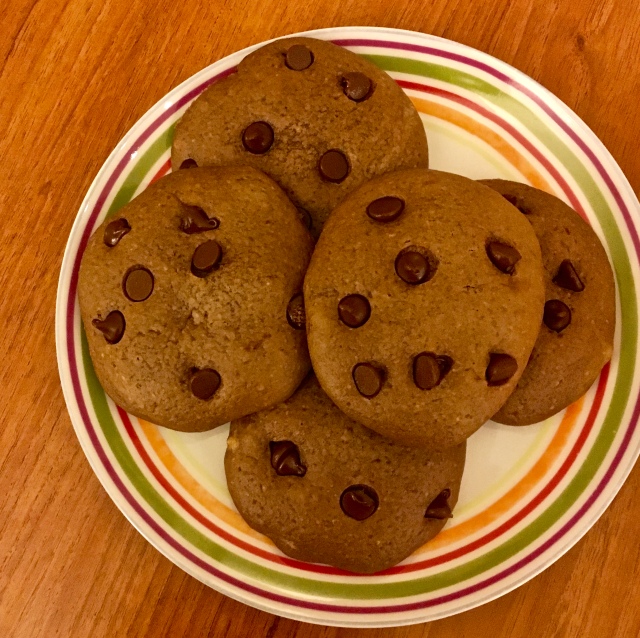
Health(ier) Double Chocolate Chip Cookies

Prep time required: 15 minutes
Makes 15 medium sized cookies
IMG_6052

I broke my foot 7 weeks ago and was put on a strict ‘no-gym’ regime for a minimum of 3-4 months.  This means no running, cycling, swimming and even no walking initially. As someone who usually hits the gym 4-5 times a week, I’m ashamed to say that the first thought that crossed my mind when I was diagnosed was ‘what will this do to my waistline!!!’.   I initially tried to cut out chocolates and biscuits, but found it required a lot of willpower when you’re sat at home, resting your foot and doing mostly nothing all day.  All I really wanted to do was reach for the nearest hob nobs packet!

Since then, I’ve been experimenting with ‘healthy’ baking, so I could have some treats and feel less guilty.  My healthy carrot cake was my first stint at this, but if you prefer something more chocolatey I’d recommend these double chocolate chip cookies.  I can’t say that they are 100% free from refined sugar, as they do contain a teeny bit of dark chocolate, but they are healthIER than their sugar filled alternatives.  They’re great as an afternoon treat or snack for work.

Ingredients:

  • 150g plain flour
  • 2 tablespoons raw cacao powder
  • 1 teaspoon baking powder
  • 1/2 teaspoon baking soda
  • 4 tablespoons honey
  • 85g dark chocolate chips (50g melted and 35g keep aside for mixing in whole)
  • 1 tablespoon coconut oil
  • 2 eggs
  • 2 tablespoons milk
  • 2 teaspoons vanilla extract

Method:

  1. Preheat your oven to 350 degrees/gas mark 4.
  2.  In a mixing bowl, combine the eggs, vanilla essence and coconut oil and honey and beat until incorporated.
  3. Melt 50g of your chocolate chips in a glass bowl over a boiling saucepan of water.  Stir into your mixing bowl.
  4. Add the remaining ingredients and mix together until combined.
  5. Cover a baking tray with baking parchment.
  6. Scoop tablespoon sized portions of the batter into balls and place on the baking tray.
  7. Bake for 8 – 10 minutes.


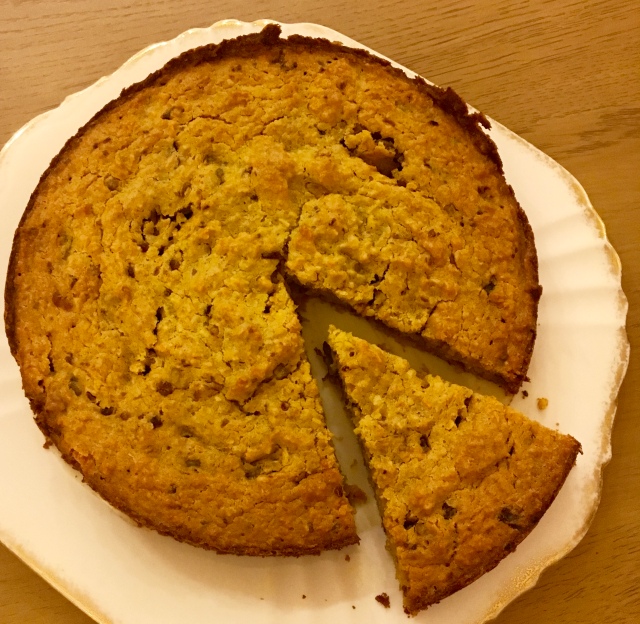
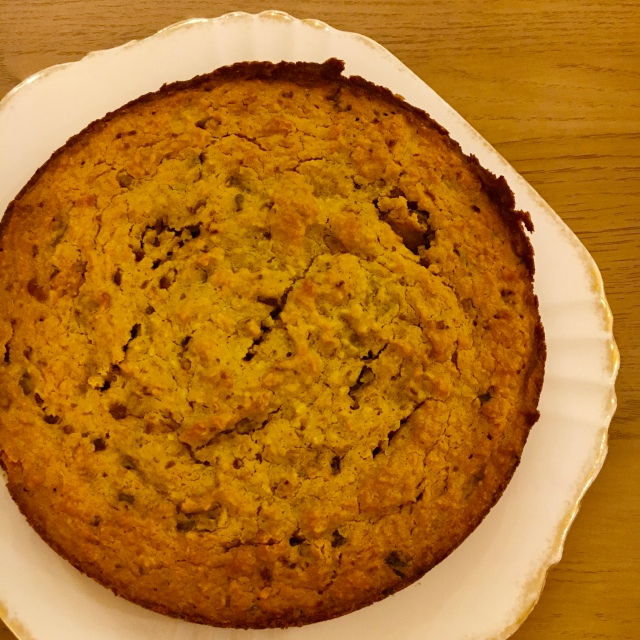
Healthy Carrot Cake

Prep time required: 20 minutes
Serves 12 

Wouldn’t life be so much better if you could eat cake completely guilt free?  My healthy carrot cake is the answer!! It is free from refined sugar and is packed with vegetables, fruit and nuts…yet it really does taste as good as the sugary version (in my opinion).  This means its not only good as a sweet treat, but also as an afternoon snack to take to work, or even a pre-gym pick-me-up.

IMG_5970

Ingredients:

  • 320g carrots, grated
  • 80g dates, finely chopped
  • 1 tbsp honey
  • 3 large eggs
  • 150g coconut oil
  • Zest of 1 orange
  • Seeds from 8 cardamom pods
  • 160g plain flour
  • 120g desiccated coconut
  • 1 tbsp baking powder
  • 120g chopped walnuts

Method:

  1. Pre-heat your oven to Gas Mark 3 and grease and line a 20cm cake tin with baking paper.
  2. Mix the carrots, dates eggs, coconut oil and orange zest together in a mixing bowl.
  3. Stir in the rest of all the ingredients except the walnuts.
  4. Blitz the mixture in a food processor or blender and then stir in the walnuts.
  5. Pour the mixture into the cake tin and bake in the oven for 65 minutes.  You’ll know when its cooked when a knife inserted into the centre comes out clean.
  6. Store in an airtight container.


IMG_5948

IMG_5973

Easter Rocky Road

Prep time: 25 minutes 

Makes approximately 30 squares

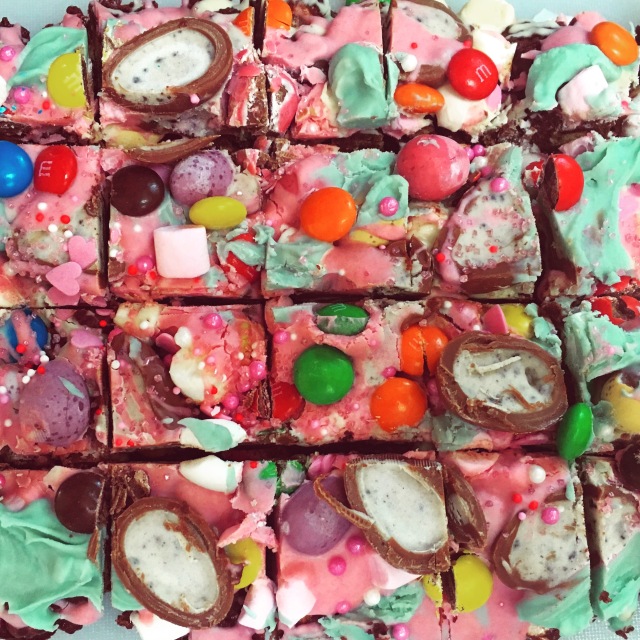
I love Easter (Probably because I was born on Good Friday!). But also because Easter chocolate is better than any other type of chocolate! This Easter Rocky Road recipe is full of Oreo Easter Eggs, Mini Eggs and M&Ms… And lots of other things that are super delicious and not very good for you!


These Rocky Road bites honestly taste amazing… I took a batch to the office and they were literally gone within seconds. The soft marshmallows and the crunchy biscuits provide the perfect combination of textures. The marbled finish also makes them so pretty and perfect for serving the family over Easter.  It’s so easy to make, and doesn’t even require baking!


Ingredients:

  • 200g Dark Chocolate (this can be any type or brand of chocolate – I like to use Asda’s Smartprice brand, it’s so cheap, yet is one of the best tasting chocolate I’ve tried!)
  • 200g White Chocolate (this should be a ‘best for baking’ type of chocolate, to avoid curdling)
  • 100g mini marshmallows
  • 2 tablespoons golden syrup
  • 125g unsalted butter
  • 90g mini eggs 
  • 90g mini Oreo eggs (these can also be substituted for mini creme eggs)
  • 160g digestive biscuits
  • A handful of pink cake decorations including hundreds of thousands and mini hearts.
  • 50g M&Ms
  • Pink food colouring 
  • Blue food colouring 

Method:

  1. Line a square cake tin with baking parchment.
  2. Melt your dark chocolate, golden syrup and butter in a saucepan over a low heat. 
  3. Place your digestive biscuits in a sandwich bag and smash with a rolling pin until the biscuits are around the size of 5p pieces. Add these to your saucepan and stir until all the biscuit pieces are covered in the chocolate mixture. Add half of the mini eggs and half of the marshmallows to the mixture and stir so they are mixed together.
  4. Pour your mixture into your baking tray and pat down firmly with a wooden spoon. Add a few more mini eggs and marshmallows on the top but make sure there are still some left over for the topping.
  5. Divide your white chocolate into 3 glass bowls and bring a saucepan full of water to boil. Melt the first batch of white chocolate in the bowl over the saucepan. Leave this batch uncoloured. Once melted, drizzle over your biscuit mixture in the cake tin. Add a few more mini eggs, marshmallows, Oreo eggs chopped in half, and a few m&ms on top.
  6. Melt your next batch of white chocolate and add the pink food colouring. Drizzle over your mixture in the cake tin to create a marbled effect. Add a few more mini eggs, marshmallows, Oreo eggs chopped in half, and a few M&Ms on top.
  7. Melt your final batch of white chocolate and add the blue food colouring. Drizzle over your mixture in the cake tin to create a marbled effect and add your remaining mini eggs, marshmallows, Oreo eggs, M&Ms and sprinkle your pink cake decorations over the top. 
  8. Refrigerate for 2-3 hours, until hard. 
  9. Cut your Rocky Road into small squares and store in the fridge for up to 2 weeks (if they last that long!!)

Chocolate Biscuit Bites

img_0225

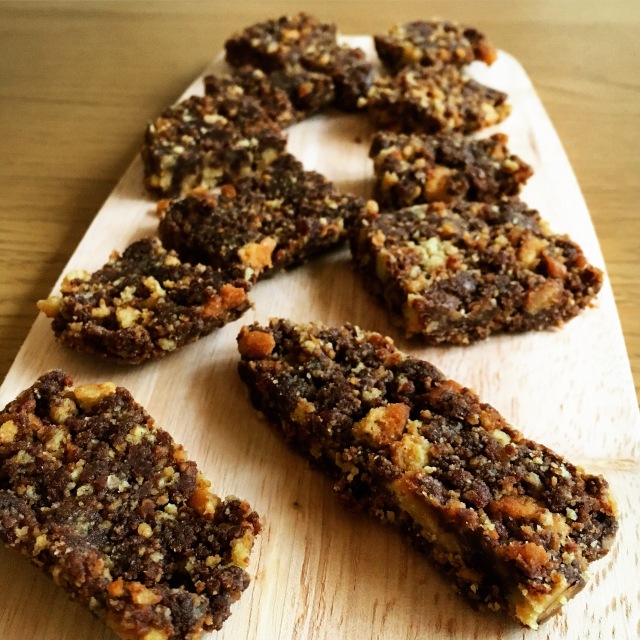
I originally saw this recipe being made on Blue Peter over a decade ago! They called it ‘Blue Peter Party Cake’, but then a few years later my best friend came over with the same exact cake calling it ‘Polish Cake’.  Either way, it’s been a firm favourite in our household ever since, and we now call it ‘Chocolate Biscuit Bites’ because, well, that’s basically what it is!

They are super buttery and delicious and basically taste like biscuits dunked in hot chocolate.  What’s not to like?

img_0224

Prep time: 15 minutes 

Ingredients:

  • 225g plain biscuits (I used plain digestive biscuits)
  • 110g margarine
  • 1 tablespoon golden syrup
  • 2 dessertspoons cocoa
  • 2 dessertspoons drinking chocolate
  • 1 dessertspoon caster sugar

Method:

  1. Break up your biscuits by placing them in a freezer bag and smashing them with a rolling pin.  Break until they are around the size of 5p pieces.
  2. In a saucepan, mix the margarine, the golden syrup, cocoa, sugar and drinking chocolate over a low heat until combined.
  3. Once they’ve all melted together, pour the mixture over the biscuits and mix it all together with a wooden spoon.
  4. Spoon the mixture into a well greased cake tin, I used a square one so it can be cut into mini squares but you can also use a circular one if you prefer.
  5. Put some greaseproof paper on top and then, to keep it tightly packed together, stick a plate on top and then a couple of tinned soups or beans to weigh it down.
  6. Leave to set overnight in the fridge, then remove and cut into squares.
  7. Store in an airtight container at room temperature, enjoy!

Nutella Granola

Sometimes, the best cure for a Monday is… A big dollop of Nutella! Seriously, I actually believe that Nutella fixes most of life’s problems, or at least definitely improves them 🤔. Hence why I’ve just whipped up a batch of my Nutella granola. 😍

It can be eaten dry as a snack, or even served with milk to make a tasty cereal. It tastes even better if you use hazelnut milk. I’m normally one for healthy eating and would never usually have anything chocolatey for breakfast, but sometimes you’ve just gotta #treatyoself 🙈


Ingredients 

  • 250g rolled oats
  • 2 tablespoons coconut oil 
  • 90g Nutella 
  • 2 tablespoons honey
  • 50g walnuts 
  • 50g almonds
  • 50g chocolate chips 

Method 
1. Preheat your oven to Gas Mark 3 and line a baking tray with baking paper.

2. Melt the Nutella, coconut oil and honey over a low heat until combined.

3. Pour the rolled oats into a mixing bowl and pour the melted Nutella mixture over it and stir until all the oats are covered. 

4. Stir in the almonds, walnuts and chocolate chips then lay the mixture on the baking tray 

5. Bake for 30 minutes. 

6. Leave to cool, then store in an airtight container at room temperature for up to 3 weeks.

Rainbow Cookies


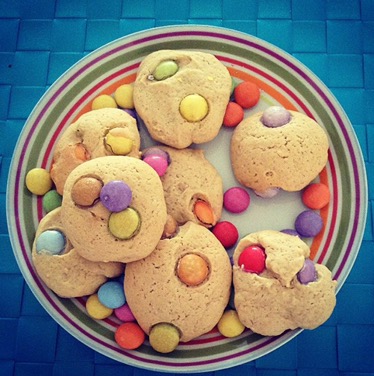
This recipe combine two of my favourite things…. Cookies and Smarties! They are very colourful so look super fun and impressive (but are totally simple to make). I’m not going to pretend these are healthy in any way… But like most unhealthy treats, they taste amazing!
Prep time: 20 minutes 

Makes approximately 30 medium sized cookies.

Ingredients:

  • 475g plain flour
  • 1 teaspoon baking soda
  • 1/8 teaspoon salt
  • 120g butter (melted)
  • 140g caster sugar
  • 120g brown sugar
  • 2 large eggs
  • 1 teaspoon vanilla
  • 150g Smarties 

Method:

1. Preheat the oven to gas mark 5 and line a baking tray with greaseproof paper.

2. Mix the flour, baking soda and salt in a medium sized bowl using a wooden spoon.

3. In another bowl cream the butter, sugar and the brown sugar using an electric mixer. Add the eggs and the vanilla and mix on medium speed until combined.

4. Add in the flour mixture on low speed until combined. Then add in the Smarties and gently fold it into the mixture using a wooden spoon.


5. Scoop a small ball of dough into the palm of your hand and flatten. Place the dough ball onto your baking tray.


6. Bake for about 8-10 minutes. The cookies may feel soft when you remove them from the oven, but they will become crisper when cooled.


7. Remove the cookies from try and let them cool on wire racks. Store in an airtight container for up to 3 weeks. Then, enjoy!

Rudolph Truffles

227003_10152343995745858_58957046_n

Photo credit: Ameer Kotecha

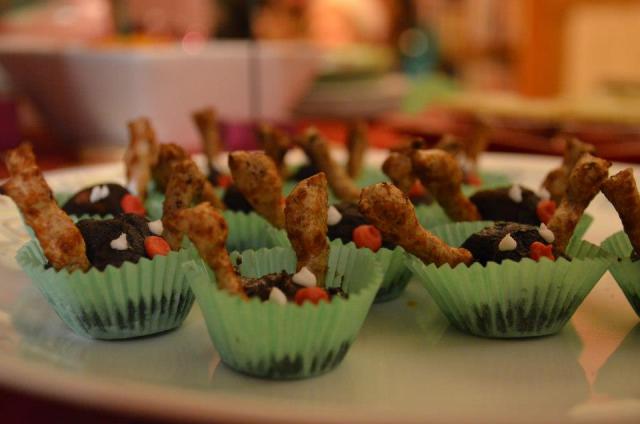
As the festive season draws closer, these cute Rudolph Truffles are just what you need to get in the mood for Christmas.  They’re perfect for a Christmas party, or to be wrapped and put under the tree.

Overall time needed: 4.5 hours (including 4 hours chill time)

This recipe will make 50 truffles

Ingredients:

  • 300g dark chocolate (I would recommend Asda’s Smartprice Chocolate – only 35p per 100g but is just as delicious as any premium brand!)
  • 300ml pot double cream
  • 50g unsalted butter
  • 1 packet of twiglets
  • Mini cupcake cases
  • Coloured writing icing

Method:

  1. Break the chocolate into a large glass bowl.  Pour the cream and butter into the bowl and heat on a low heat over a saucepan full of boiling water.  Stir until you have a smooth mixture.
  2. Cool for 4 hours in the fridge.
  3. To shape the truffles into balls, use a melon baller to scoop out the mixture.  To make them perfectly rounded you can use your hands at this stage.  Place in the mini  cupcake cases.
  4. Break the twiglets in half and gently poke them into the truffles to create the antlers
  5. Use green writing icing to add the eyes, and red icing for the noses.
  6. Store in the fridge in an airtight container for 3 days. Enjoy!

reindeer


Coffee & Walnut Cupcakes

baking2

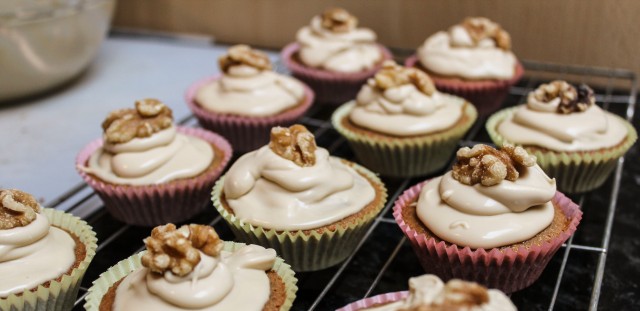
This recipe is a cupcake adaptation of a traditional tea-time favourite!  The best part of these cupcakes is the mascarpone icing, which is creamy and not overly sweet like other icing types.

This recipe will make around 12 cakes.

Preparation: 15 mins
Cooking: 20 mins

Ingredients:

  • 100g butter
  • 100g light muscovado sugar
  • 100g self-raising flour
  • 2 large eggs
  • 2 tsp instant coffee, mixed with 100ml boiling water, then cooled
  • 25g chopped walnuts with 12 more for decoration

For the icing:

  • 200ml mascarpone
  • 2tbsp light muscovado sugar

Method:

  • Heat the oven to gas mark 4 and line a cake tin with cupcake cases.
  • Beat the butter, sugar, flour and eggs in a large bowl with 2tsp of the coffee mixture until creamy.
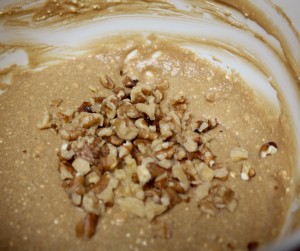
  • Add a pinch of salt and the chopped walnuts

baking day 3

  • Spoon the cake mix into the cases and bake for 18 – 20 mins in the middle of the oven until golden.

baking day 1

  • To make the icing, put the mascarpone and 2tsp of the coffee and sugar into a bowl and beat together.  The icing should be slightly runny.
  • Spread the icing on top of each cupcake and decorate with some chopped walnuts

baking1

  • If the icing is too runny, you can place the cakes in the fridge for an hour to set.  Enjoy!

baking day 2

baking7

Nutella-chocolate-chip Cookies

nutella 1


Nutella is one of my favourite baking ingredients.  If you love Nutella, then these Nutella-chocolate-chip cookies are a must-try.  They are crisp on the outside, with a soft, gooey centre.  They are quick and easy to make, and the best part is they stay as tasty the next day!

photo

This recipe was recommended to me by a friend, and will make around 30 medium-sized cookies.

Overall preparation time: 20 mins

Ingredients:

475g plain flour
1 teaspoon baking soda
1/8 teaspoon salt
120g butter (melted)
140g caster sugar
120g brown sugar
2 large eggs
1 teaspoon vanilla
60g Nutella
200g chocolate chips (I would recommend dark chocolate chips, as these complement the Nutella well)

Method:

1. Preheat the oven to gas mark 5 and line a baking tray with greaseproof paper.

2. Mix the flour, baking soda and salt in a medium sized bowl using a wooden spoon.


3. In another bowl cream the butter,  sugar and the brown sugar using an electric mixer. Add the eggs and the vanilla and mix on medium speed until combined.

4. Add in the flour mixture on low speed until combined. Then add in 30g of Nutella and gently fold it into the mixture.  You don’t want to mix the Nutella into the batter too much, in order to get ‘nutella swirls’ in the cookies.nutella 2

5. Mix in the chocolate chips using a wooden spoon.

6. Scoop a small ball of dough into the palm of your hand and flatten.  Place a small dot of nutella in the centre and fold the edges of the dough around it, and flatten slightly.  Place the dough ball onto your baking tray.

nutella 3

7. Bake for about 8-10 minutes.  The cookies may feel soft when you remove them from the oven, but they will become crispier when cooled.

8. Remove cookies from try and let them cool on wire racks.

nutella 4


nutella 5

Mojito Cupcakes

‘A cocktail in a cake’. 

mojito3

Love mojitos? Can’t resist a cupcake? Then these mojito cupcakes are for you.

Whilst on holiday I visited Cacao Sweets & Treats in Grayslake, Illinois and came across the concept of alcoholic cupcakes. (www.cacaosweetsandtreats.com) They were so good that I decided to bake a batch myself! They really do taste like a real mojito, and make a perfect dessert!

Overall preparation time : 50 minutes

Ingredients:

For the Cupcakes:

  • 115ml buttermilk
  • 115g mint leaves, bruised
  • 350g all-purpose flour
  • 1.5 teaspoons baking powder
  • 0.25 teaspoon salt
  • 115g unsalted butter
  • 235g granulated sugar
  • 2 eggs
  • Zest and juice of 1.5 limes
  • 2 tablespoons white rum
  • 0.25 teaspoons vanilla extract

To brush the cupcakes:

  • 2 tablespoons white rum
  • 2 sprigs fresh mint

For the icing:

  • 150g unsalted butter
  • 400g icing sugar
  • 1.5 tablespoons lime juice
  • 3 tablespoons white rum

Method:

  • Preheat the oven to Gas Mark 3 and line a cupcake tin with paper cases
  • Bruise the mint leaves through tapping the leaves 10 – 15 times with the back of a spoon
  • Place the buttermilk and mint leaves (for the cakes) in a saucepan over a low heat and warm until the mixture starts to steam, but do not simmer.  Remove from the heat and cover.  Leave to steep for 30 minutes then strain the mixture into a bowl using a sieve.  Make sure to press on any buttermilk solids and mint leaves to extract as much liquid as possible.

mojito1

  • In a large bowl, beat the butter and sugar together until light and fluffy.  Add the eggs one at a time and beat thoroughly. (I would recommend using an electric mixture on medium-high speed!)
  • Add the lime zest, lime juice, vanilla extract and rum.  Mix until combined.  Add the flour, baking powder and salt to this bowl and then the buttermilk mixture.

mojito2

  • Place the batter in the paper cases and bake for 25 minutes, until golden.
  • While the cupcakes are baking, combine the rum and mint sprigs in a small saucepan and warm over a low heat and remove as soon as the mixture starts to simmer.  Steep until ready to use.
  • Remove the cupcakes from the oven and cool for 5 to 10 minutes.
  • Brush the tops of the cupcakes with the mint-infused rum.
  • To make the icing, whip the butter and the icing sugar until incorporated.  Add the lime juice and rum.
  • Frost the cupcakes and garnish with a lime wedge and mini-umbrella.  Enjoy!

mojito6

mojito5